Gobble gobble! Want to learn how to draw a cute turkey with big, beautiful tail feathers? It’s easier than you think to bring this festive bird to life on paper! Our simple, step-by-step guide is perfect for young artists. Get ready to create your own cartoon turkey drawing.
When you finish the tutorial, grab our FREE PDF Worksheet! It shows all the steps and gives fun space for kids to practice their drawings anytime!
Grab a pencil, and let’s start drawing your turkey!
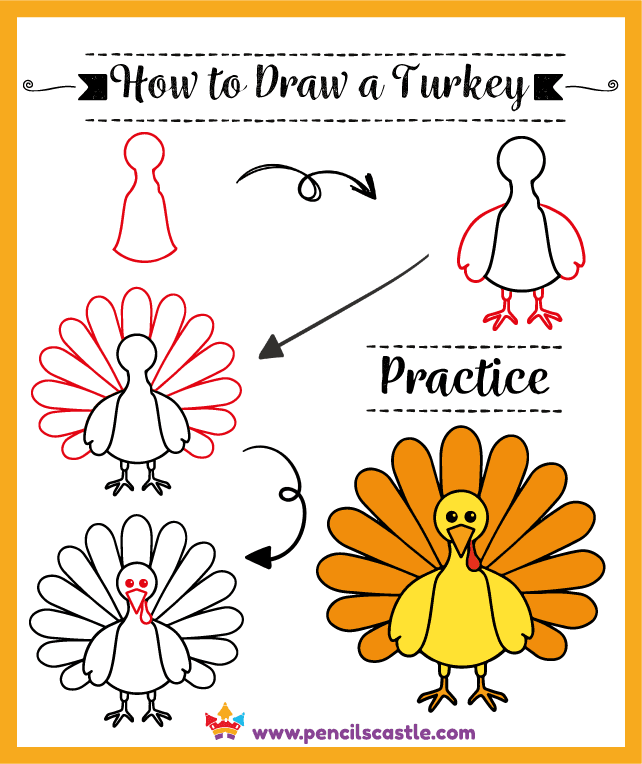
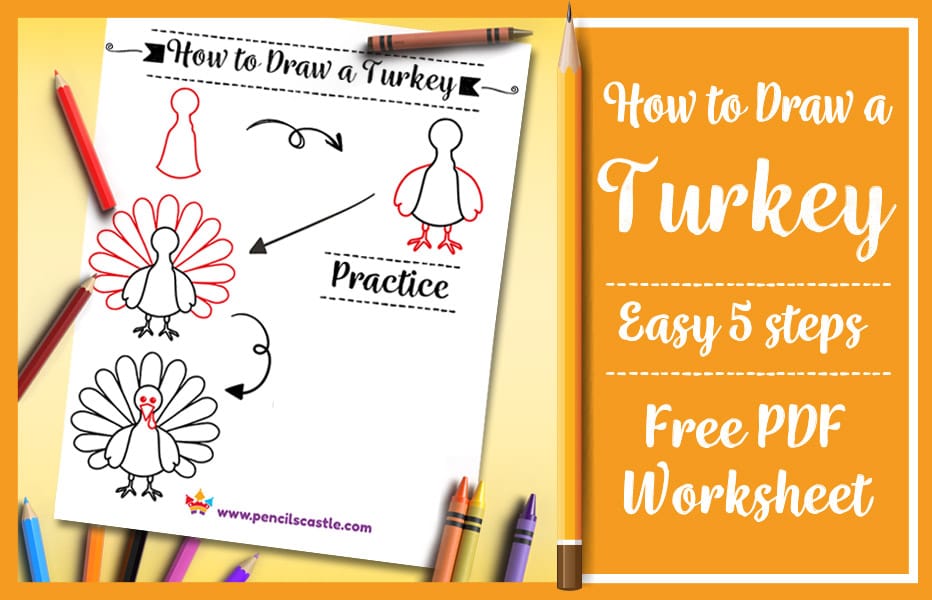
Easy 5 Steps How to Draw a Turkey + Free Practice Worksheet
Follow these five easy steps to draw a cute cartoon turkey.
Drawing Materials
- Paper
- Pencil
- Eraser
- Crayons, markers, or colored pencils
- Our Turkey Drawing Guide PDF Worksheet (optional)
Start by drawing lightly so that you can easily erase if there are mistakes. Continue by following the arrow step.
Step 1: Draw the Turkey’s Body Outline
Start by drawing a rounded, somewhat pear-shaped body for the turkey. It should be wider at the bottom and narrower at the top, forming the neck. Add a circle at the top for the head.

Step 2: Add the Turkey’s Legs and Wings
Draw two short, sturdy lines extending downwards from the bottom of the body. Add three short, pointed toes at the bottom of each leg.
For the wings, draw a rounded, slightly elongated oval shape on the sides of the turkey’s body.

Step 3: Draw the Tail Feathers
This is where the turkey’s showy tail comes to life! At the back of the body, draw a series of rounded, elongated “petal” shapes, fanning out beautifully from the back of the turkey’s body. These will be the individual feathers, overlapping each other.

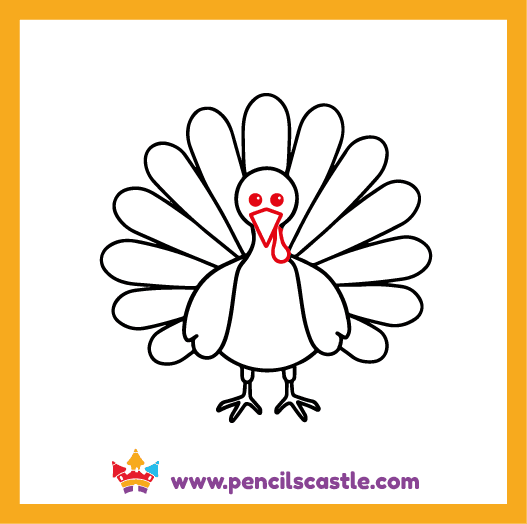
Step 4: Add the Eyes, Beak, and Snood
Let’s give our turkey a friendly face!
- Inside the head area, draw two small, round shapes for the eyes with small dots inside.
- From the front of the head, draw a short, pointed triangle for the beak.
- Hanging down from the beak, draw a long teardrop shape for the snood.
Step 5: Color Your Festive Turkey!
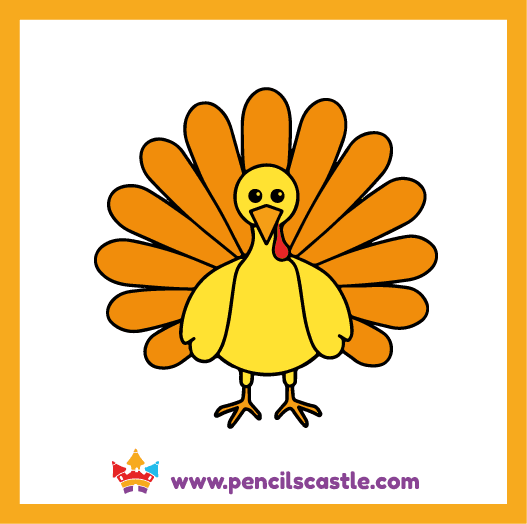
Time to bring your turkey to life with color! Our example turkey is a bright yellow with orange tail feathers. Make the tail feathers different shades of brown, orange, red, and yellow for a vibrant look! Color the snood red, and the legs and beak yellowish-orange.
Free Turkey Drawing Practice PDF Worksheet!
Practice makes perfect! Download our FREE PDF Practice Worksheet to help you practice the 5 easy steps.
This worksheet includes clear instructions and a blank section for kids to create their own turkey. Perfect for practicing at home, in the classroom, or anywhere! Click below to get your printable worksheet and have fun drawing!
Terms of Use: You can print as many copies as you need for your kids, students, or groups. To share, please link to this page. Please don’t sell, email, post, or share these files in any other way. Thank you!
turkey drawing worksheet pdfExplore Our 54 Turkey Coloring Pages
Do you love turkeys? After drawing your turkey, you can have even more fun with our 54 Turkey Coloring Pages! 🖍️ These printable pages are perfect for kids who love coloring and creating cute turkey art.
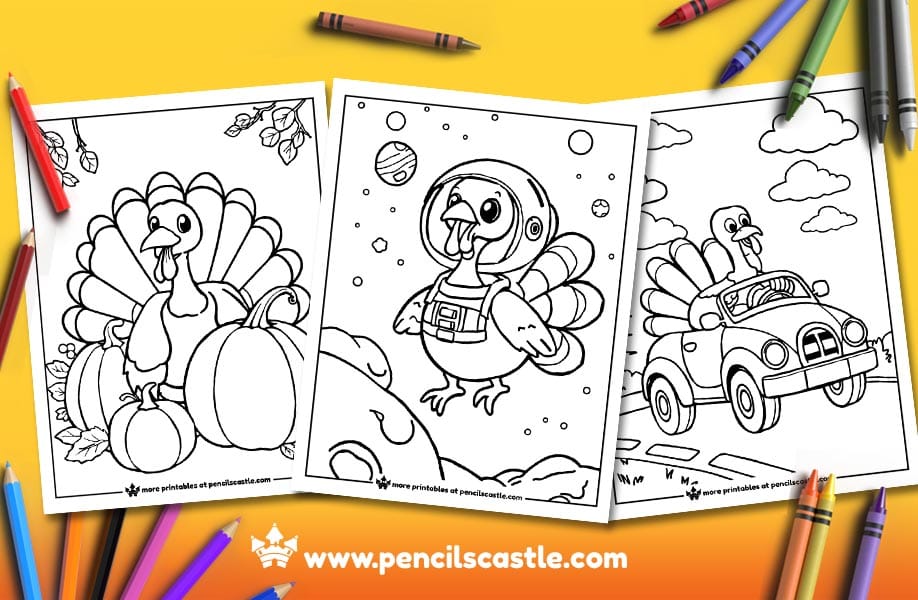
👉 Explore Turkey Coloring Pages Here
How to Fix Common Turkey Drawing Mistakes
- Body Too Thin: Turkeys have plump, rounded bodies. If your turkey looks too skinny, try making the body shape (from Step 1) wider and more rounded at the base.
- Tail Not Big Enough: The tail is a turkey’s most impressive feature! If your tail looks small, go back to Step 3 and make the feathers larger and fill out the space.
- Missing Snood: The snood is a distinctive part of this cartoon turkey! If you forgot it, add it in Step 4.
- Legs Uneven: Turkey legs are sturdy. If yours look too long or skinny, refer to Step 2 and make them shorter and thicker.
- Feathers Not Overlapping: For a full, fanned-out tail, make sure the feathers overlap each other as shown in Step 3.
Helpful Drawing Tips and Tricks For Kids
- Start with the Body: Getting the main body shape right first helps to proportion the rest of the turkey.
- Fan Out the Tail: When drawing the tail feathers, imagine them spreading out like a beautiful fan.
- Use Light Lines First: Sketch your shapes lightly with your pencil. This makes it easy to erase and adjust before you draw darker.
- Practice Shapes: Before drawing the whole turkey, try practicing just drawing the rounded body, the long feathers, or the small head. This can help you get comfortable with each part.
- Practice Makes Perfect: Don’t get discouraged if your first turkey isn’t exactly right. Keep practicing, and you’ll improve!
Turkey Fun Facts for Kids
- Native to America: Wild turkeys are native to North America!
- “Gobble, Gobble!”: Only male turkeys, called gobblers or toms, make the famous “gobbling” sound.
- Feather Colors: Turkeys have iridescent feathers that can shimmer with red, green, copper, and bronze colors in the sunlight.
- Fast Runners: Wild turkeys can run surprisingly fast, up to 25 miles per hour!
- Turkeys Can Fly: Even though they’re big birds, wild turkeys can fly short distances—usually just over trees or fences to escape danger.
More Fun Drawing Guides:
Explore our How to Draw a Goose for Kids
Don’t miss our How to Draw a Cow for Kids
Grab our How to Draw a Donkey for Kids
You will also love our How to Draw a Cat for Kids
Check out our How to Draw a Puppy Dog for Kids
Discover our How to Draw a Bird for Kids
Looking for more fun animal drawings? Check out our How to Draw Animals Tutorials for more easy step-by-step guides to drawing animals.