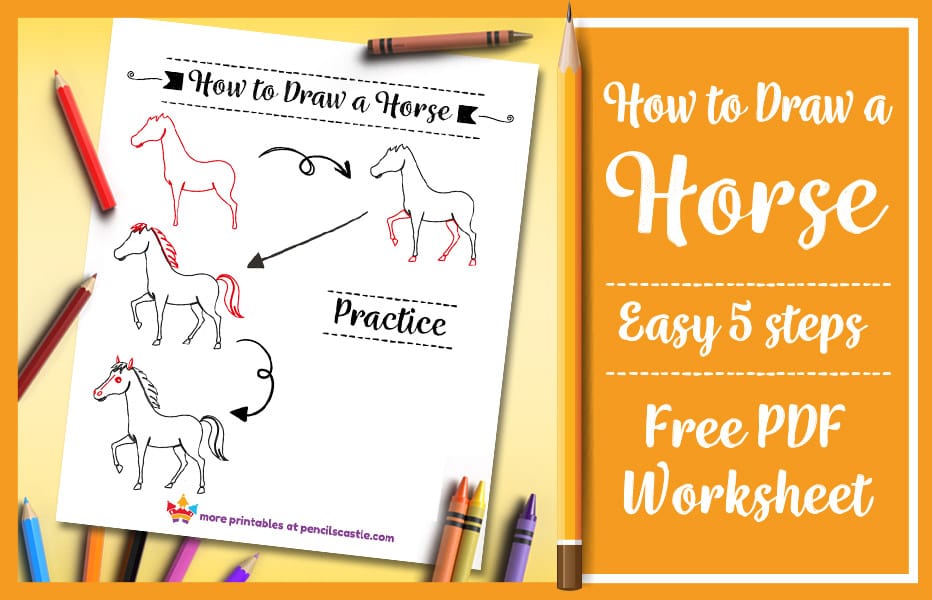
Drawing a horse can be a fun and rewarding activity for kids, especially with a simple step-by-step guide to follow! In this article, we’ll break down how to draw a horse in just 5 easy steps, perfect for beginners.
In the end, you can Download a Free Worksheet PDF that includes all the steps with an empty space at the bottom to practice drawing your horse!
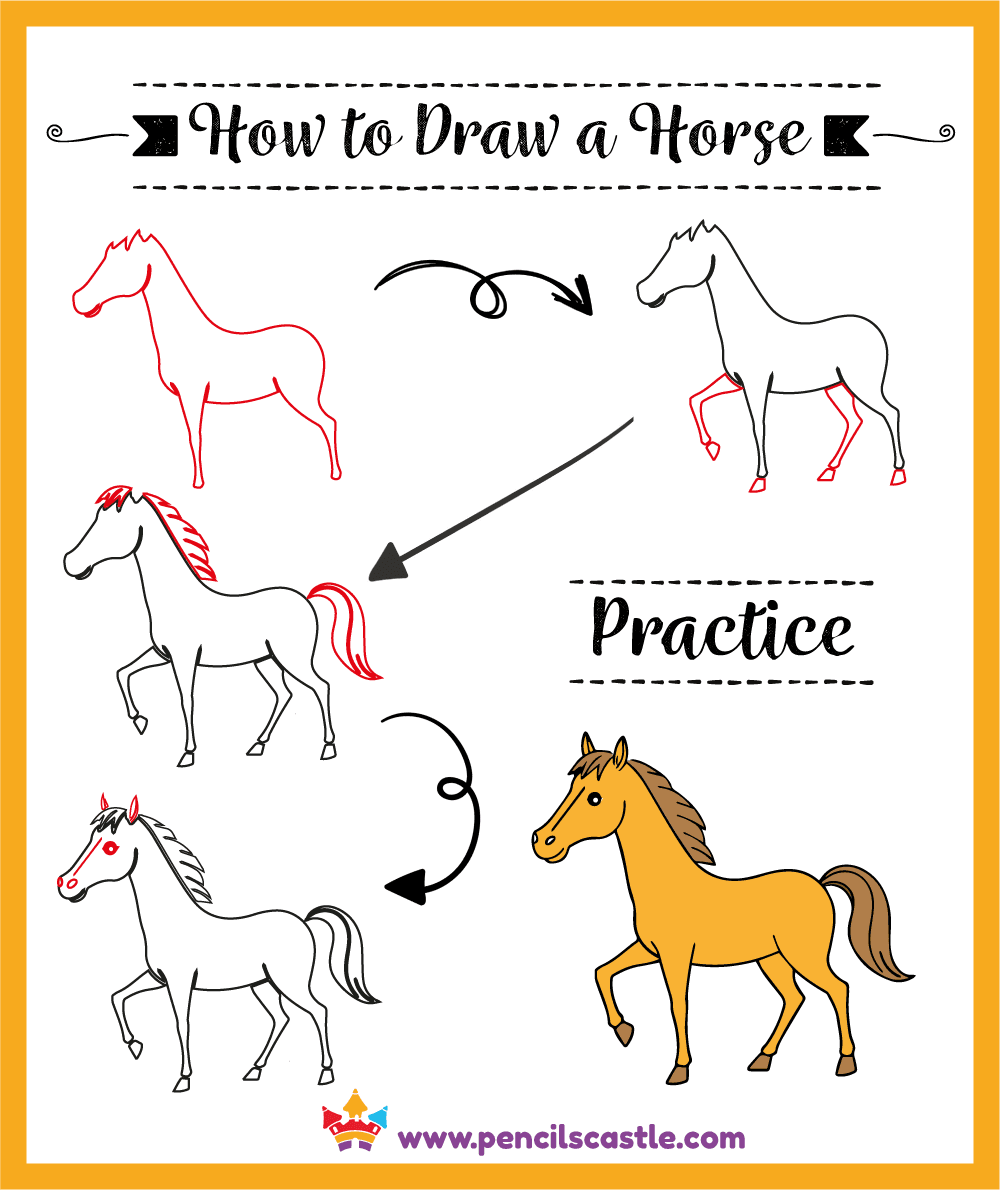
Easy 5-Step Horse Drawing + Free Practice Guide
Drawing Materials
- Paper
- Pencil
- Eraser
- Crayons, markers, or colored pencils
- Our Horse Drawing Guide PDF Worksheet (optional)
Start by drawing lightly so that you can easily erase if you make any mistakes.
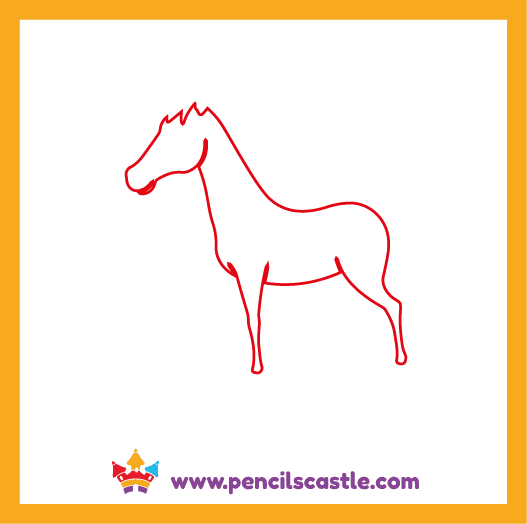
Step 1: Start by Drawing the Body Shape
Begin with a large oval for the horse’s body. Next, draw a curved line connecting the body to the head for the neck, and give it a slight arch to make the horse look graceful.
Then, attach a smaller oval to the top of the larger one to form the horse’s head. Add small triangles at the top of the head for the horse’s face hair. Finally, draw two straight lines extending from the bottom of the body for the first legs.
- Tip: Make sure the body’s oval is slightly longer than it is wide for good proportions.
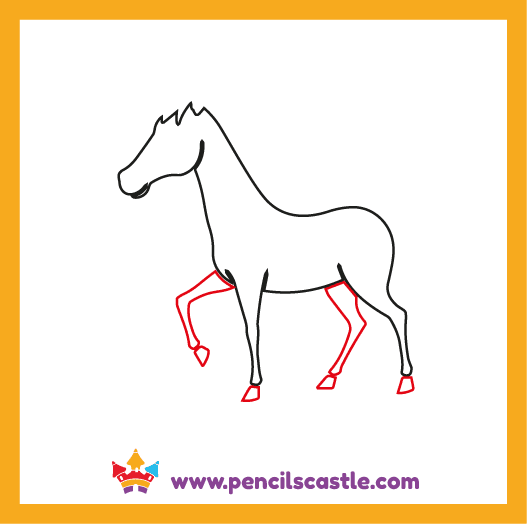
Step 2: Draw the Horse’s Legs and Hooves
For the legs, draw a curved triangle shape for the front leg to show movement, and use straight lines for the back leg. Then add small trapezoids at the bottom of each leg for the hooves.
- Tip: The front leg should be curved to show motion, while the back legs can stay straight to balance the body.
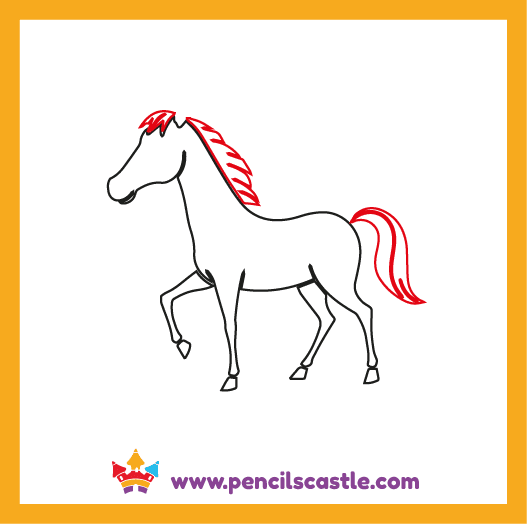
Step 3: Draw the Mane and Tail
Next, draw the horse’s mane by adding wavy lines along the neck. Start from the base of the head and extend the mane down towards the shoulders.
For the tail, draw a long, flowing line starting from the horse’s back. After that Add another line in the middle of the tail to give it more volume and realism.
- Tip: The mane and tail should be wavy and free-flowing to give the horse a dynamic look.
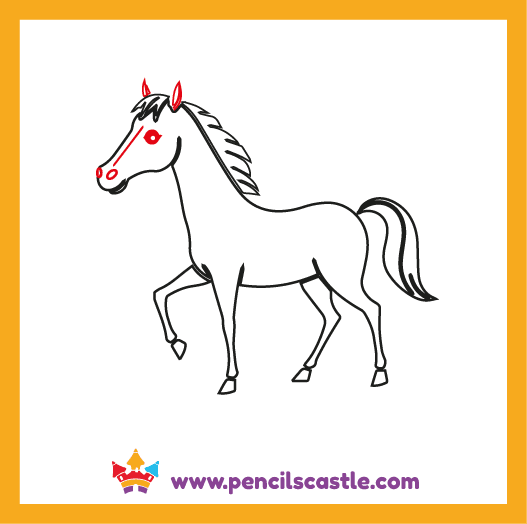
Step 4: Draw Face Details of the horse
Now, add details to the horse’s face. Draw a small circle for the eye with a smaller circle inside for detail. Then draw two small ovals for the horse’s nose and a small curved line below for the mouth.
To add more expression, draw a straight line between the eye and the nose. Finally, add two pointy triangles at the top for the ears.
- Tip: Big, bright eyes and small details on the face make the horse look friendly and lifelike.
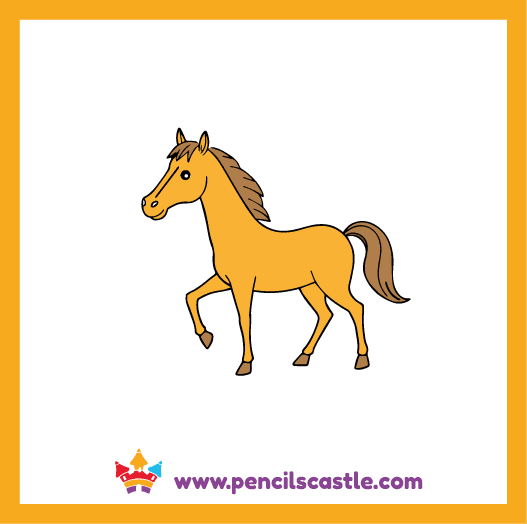
Step 5: Color the Horse
Once the drawing is complete, it’s time to color the horse! Traditional horses come in colors like brown, black, grey, and white, but let your child experiment with different colors to make their horse unique and creative.
- Tip: Encourage your kids to color their horse in whatever colors they like—there are no rules when it comes to creativity!
Free Horse Drawing Practice PDF Worksheet!
To help your child practice drawing a horse, we’ve created a free PDF Sheet with the five steps and a space at the bottom for practice. Download it now and keep the fun going!
Terms of Use: You can print as many copies as you need for your kids, students, or groups. To share, please link to this page. Please don’t sell, email, post, or share these files in any other way. Thank you!
horse drawing worksheet pdf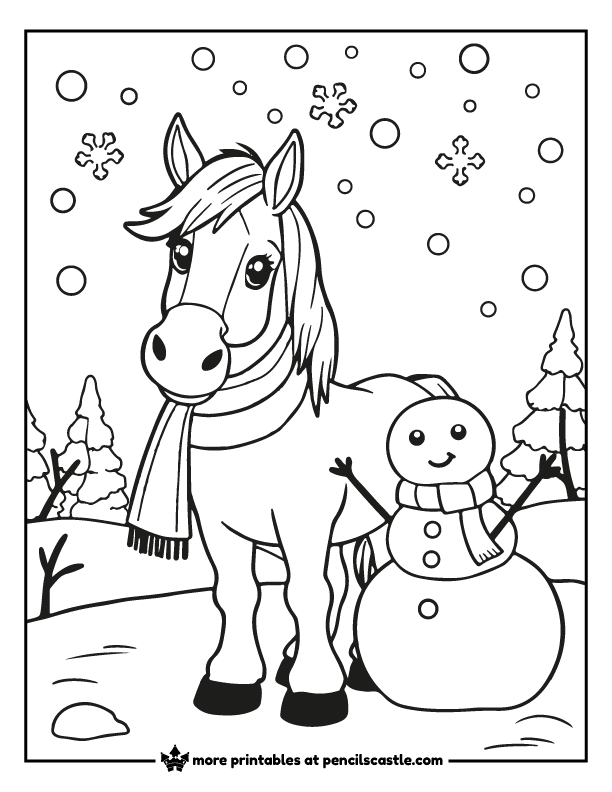
Explore Our 24 Horse Coloring Pages
Want more horse-themed activities? Check out our collection of 24 Horse Coloring Pages for endless coloring fun! These pages are perfect for creative play and a great way to spend time with your favorite cute farm animals.
👉 Explore 24 Horse Coloring Pages Here
How to Fix Common Horse Drawing Mistakes
Mistakes are part of learning! Here’s how to fix common ones:
- One leg is too long? Check if your rectangles match—use your pencil to measure.
- Tail looks flat? Try adding more curves and layers for fluffiness.
- Mane looks stiff? Use zigzags or wavy lines that follow the curve of the neck.
- Face looks funny? Keep eyes and ears balanced—check if they’re the same size.
- Body looks too small? Make sure your oval is big enough to fit all the legs!
👉 Draw light at first, then trace darker once you like your lines.
Helpful Drawing Tips and Tricks for Kids
Here are some easy tips to help you become a better artist:
- 🐴 Start with big shapes like ovals and rectangles to build your horse’s body and legs.
- 🖊️ Start with Light Lines: Use a pencil and draw softly so you can erase easily.
- 📐 Use Simple Shapes: Look for circles, rectangles, and triangles in every part you draw.
- 🕓 Take Your Time: Don’t rush—drawing is more fun when you go slow and enjoy it.
- 🔁 Practice Often: The more you draw, the better you get!
- 🎯 Check symmetry on the face—make sure both ears, eyes, and nostrils line up evenly.
Horse Fun Facts for Kids
- Horses have huge eyes and can see almost all around them, even behind!
- Horses sleep standing up! Their strong legs let them take naps without lying down.
- Baby horses are called foals, and they can stand and walk within hours of being born.
- Every horse has a unique mane and tail, just like we have different hairstyles!
- Horses move their ears to show feelings—forward means curious, back means annoyed.
More Fun Drawing Guides
Grab our How to Draw a Cow for Kids
Don’t miss our How to Draw a Sheep for Kids
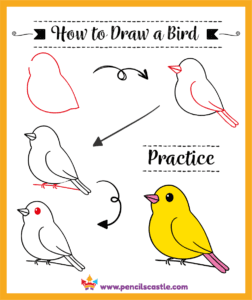
You will also love our How to Draw a Bird for Kids
Check out our How to Draw a Chicken for Kids
Explore our How to Draw a Goat for Kids
Looking for more fun animal drawings? Check out our How to Draw Animals Tutorials for more easy step-by-step guides to drawing animals.